
Can you paint motorcycle fairings yourself? Yes, you absolutely can! It takes time, patience, and the right steps, but painting your bike’s fairings at home is a rewarding project. This guide will show you how to paint bike fairings like a pro, step by simple step. We will cover everything from getting your fairings ready to adding the final shiny clear coat.
Your bike’s fairings are its outer skin. They protect parts and give your bike its look. Over time, fairings can get scratched, faded, or just look old. Painting them gives your bike a fresh, custom look. It also protects the plastic from sun and weather. Plus, doing it yourself saves money and gives you pride in your work.
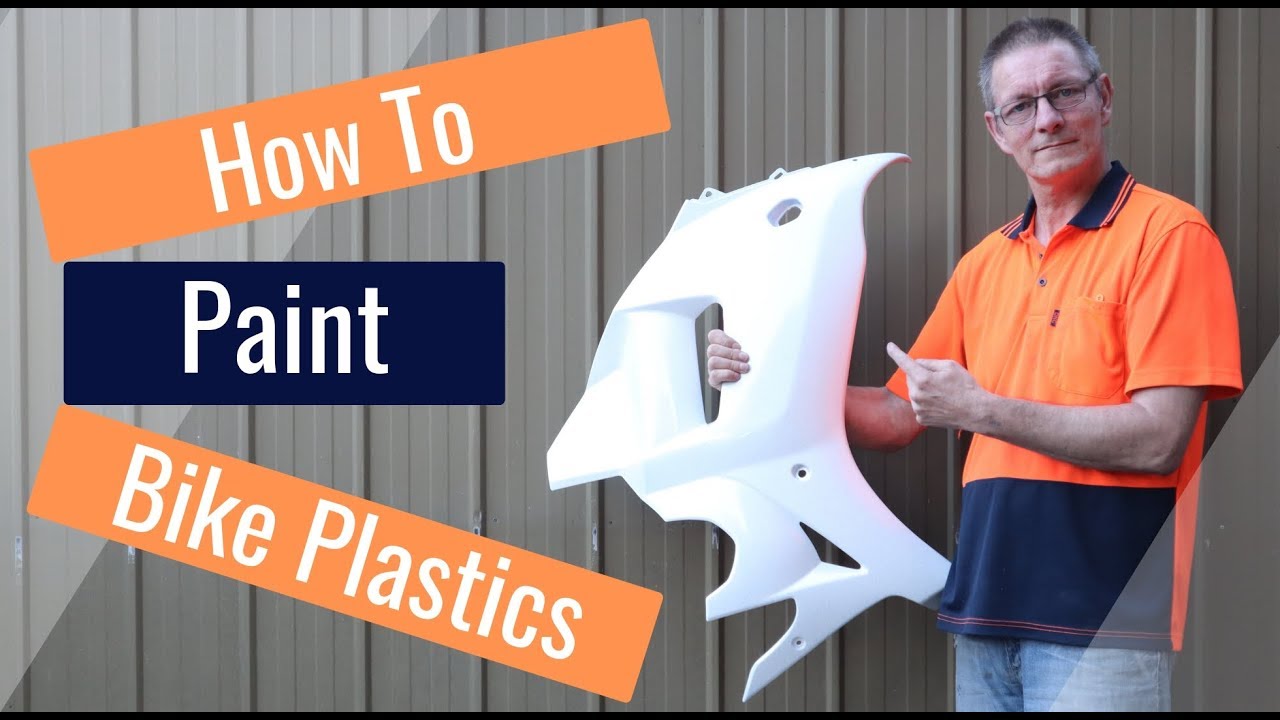
Image Source: i.ytimg.com
Getting Your Tools Ready
Before you start, you need the right tools and materials. Having everything ready makes the job smoother. This is a big part of good motorcycle fairing paint prep.
Here’s a list of what you will need:
-
Safety Gear:
- Nitrile gloves (many pairs)
- Respirator mask (for fumes)
- Safety glasses
- Disposable overalls (optional, but good for keeping paint off clothes)
-
Cleaning Supplies:
- Mild dish soap
- Water buckets
- Clean microfiber cloths
- Degreaser (wax and grease remover)
- Rubbing alcohol or panel wipe
-
Sanding Supplies:
- Various grits of sandpaper (220, 320, 400, 600, 800, 1000, 1500, 2000 grit)
- Sanding blocks (soft and firm)
- Wet sanding paper (some grits can be used wet)
- Tack cloths (to pick up dust)
-
Repair Supplies (if needed):
- Plastic repair kit (for cracks)
- Body filler for plastics (if needed)
- Sandable filler primer
-
Paint Supplies:
- Adhesion promoter (crucial for plastic)
- Plastic-compatible primer (e.g., 2K primer or a good automotive primer)
- Base coat paint (the color you want)
- Clear coat (2K clear coat is best)
- Paint mixing cups (if using 2K products)
- Paint strainers (to filter mixed paint)
- Good quality spray gun (HVLP gun is best) or aerosol cans (if doing a smaller job)
- Paint stand or hanging hooks (to hold fairings)
- Masking tape (automotive grade, fine line)
- Masking paper or plastic sheets
-
Finishing Supplies:
- Buffing compounds (cutting, polishing, finishing)
- Polishing pads (foam, various densities)
- Orbital polisher (can be done by hand, but slower)
- More microfiber cloths
Best Paint for Motorcycle Plastics
Choosing the best paint for motorcycle plastics is key. Not just any paint will stick well to plastic. You need paints designed for automotive use. These paints are flexible and bond properly to plastic.
- Primer: Always use a primer made for plastics. This is often called “adhesion promoter.” It helps the paint stick.
- Base Coat: Look for automotive-grade base coat paint. These paints come in many colors. They are durable.
- Clear Coat: A 2K (two-part) clear coat is the strongest choice. It mixes with a hardener. This makes it very durable and resistant to fuel, chemicals, and scratches. One-part clear coats are easier but not as tough.
Always read the labels on your paint products. Make sure they are right for plastic and will work together.
Getting Your Fairings Ready: The Prep Work
This is the most important step for a good paint job. Good preparation saves time and frustration later. It’s called motorcycle fairing paint prep, and it’s where most problems happen if rushed.
Step 1: Taking Fairings Off
First, carefully remove all fairings from your motorcycle. Keep track of all screws, bolts, and clips. A good tip is to label them or put them in labeled bags. Take photos as you take things apart. This helps you put them back together correctly. Remove any stickers, decals, or emblems. Use a heat gun gently to warm decals, then peel them slowly. Clean off any leftover glue with a mild adhesive remover.
Step 2: Cleaning the Fairings
Wash the fairings thoroughly. Use mild dish soap and water. Get rid of all dirt, grime, and grease. Rinse well. Let them dry completely. Then, use a wax and grease remover. This special cleaner gets rid of oils, waxes, and silicones. These things can cause paint defects. Wipe it on, then wipe it off with a clean cloth. Do this twice to be sure.
Step 3: Repairing Damage
If your fairings have cracks, deep scratches, or broken tabs, fix them now. This is where motorcycle plastic repair paint skills come in.
* For small cracks: Use a plastic welding kit or a two-part plastic repair epoxy. Follow the kit directions carefully.
* For deep scratches or uneven areas: Use a sandable plastic filler. Apply thin layers. Let it dry between layers. Sand it smooth later.
* For broken tabs: You can often repair them with a strong plastic epoxy and some backing material (like mesh) for strength.
Remember, any bumps or cracks you leave will show through the new paint. Take your time here.
Step 4: Sanding Fairings Before Paint
This is a critical step. Sanding fairings before paint makes sure the new paint sticks. It also smooths out the surface.
- Initial Sanding (220-320 grit): If you have deep scratches or repairs, start with 220-320 grit sandpaper. This grit is rough. It removes old paint and blends repairs. Sand evenly. Don’t press too hard.
- Smoothing (400-600 grit): Move to 400-600 grit. This smooths out the marks from the rougher sandpaper. If your fairings are in good shape and you’re just repainting, you might start here. The goal is to scuff the entire surface, not remove all the old paint. The surface should look dull, not shiny.
- Fine Sanding (800 grit): For the final sanding before primer, use 800 grit. This creates a very fine scratch pattern. The primer will fill these tiny scratches and bond well. For primer application, an 800-grit finish is usually perfect.
Always sand in a criss-cross pattern. Use a sanding block on flat areas. This helps keep the surface flat. For curved areas, you can use your hand or a soft foam block. After each sanding step, wipe down the fairing with a clean cloth. Use a tack cloth to pick up all dust right before priming.
| Sandpaper Grit | Purpose | When to Use |
|---|---|---|
| 220-320 | Remove old paint, deep scratches, major repairs | When fairings are very rough or have major damage |
| 400-600 | Smooth out rough sanding marks, scuff old paint | For general scuffing, after 220-320, or as first step |
| 800 | Final sanding before primer, create good adhesion | Always before primer application |
| 1000-1500 | Wet sanding before base coat (optional but good) | To get a super smooth surface before color |
| 1500-2000 | Wet sanding clear coat for buffing | To remove dust nibs and orange peel in clear coat |
Step 5: Masking
Cover any parts you don’t want painted with masking tape and paper. This includes mounting points, inner edges, or areas that will be hidden. Use good quality automotive masking tape. It prevents bleed-through and leaves clean lines.
Priming for Perfection: Fairing Primer Application
Fairing primer application is a must. Primer does several things:
* It helps the paint stick better to the plastic.
* It fills tiny imperfections left by sanding.
* It creates an even color base for your paint.
Choosing and Mixing Primer
You need a primer made for plastic. An “adhesion promoter” goes on first if your primer does not have this built in. Then, apply a high-build or filler primer. This helps fill minor scratches. If you’re using a 2K (two-part) primer, mix it exactly as the product instructions say. Use paint strainers to make sure it’s smooth and free of lumps.
Applying the Primer
- Clean Again: Before spraying, wipe the fairings one last time with a tack cloth. Make sure no dust remains.
- First Coat (Adhesion Promoter): If using a separate adhesion promoter, apply a very thin, even coat. It usually dries quickly.
- Primer Coats: Apply primer in thin, even coats. Hold the spray gun or can about 6-10 inches from the surface. Move your hand steadily. Overlap each pass by about 50%.
- Number of Coats: Two to three thin coats are usually enough. Let each coat flash off (dry to the touch) for the time stated on the product label.
- Drying: Let the primer dry fully. This is important. This could take a few hours or even overnight. Follow the product’s curing time fairing paint instructions.
After the primer is dry, inspect it. If you see any small bumps or dust, you can very lightly wet sand it with 800-grit paper. Use a light touch. Then re-clean and tack cloth.
Applying the Color: Spray Painting Bike Fairings
Now for the fun part: applying the color. This is where your spray painting bike fairings skills will shine.
Setting Up Your Spray Area
Make sure your spray area is clean, well-lit, and dust-free. Good airflow is important for fumes. Use a respirator mask!
Choosing and Mixing Paint
Make sure your base coat paint is designed for automotive use and compatible with plastics. If you’re using a spray gun, mix your paint according to the manufacturer’s directions. Strain it before putting it in the gun.
Spraying the Base Coat
- Test Spray: Always do a test spray on a piece of cardboard or scrap plastic first. This helps you get the right distance and speed.
- Thin Coats: Apply the base coat in thin, even layers. Don’t try to cover everything in one go. Thin coats reduce runs and give better coverage.
- Distance and Overlap: Hold the gun/can 6-10 inches from the surface. Overlap each pass by about 50%. Move your arm, not just your wrist, to keep the distance even.
- Flash Time: Allow each coat to “flash off” before applying the next. This means waiting for the paint to become dull, losing its wet look. This can be 5-15 minutes, depending on the paint and temperature.
- Number of Coats: Apply 2-4 coats, or until you have full, even color coverage. Darker colors might need fewer coats, lighter colors might need more.
- Patience is Key: If you get a run, don’t touch it! Let it dry completely. You can sand it lightly later before adding more coats.
After the last base coat, let it dry for the time suggested by the paint maker. This is usually 30 minutes to an hour before applying clear coat.
The Protective Shield: Clear Coat Application Fairings
The clear coat gives your paint job depth, shine, and protection. Clear coat application fairings is where your bike gets its factory-like finish.
Why Use Clear Coat?
Clear coat protects your base coat from UV rays, scratches, chemicals, and fuel spills. It also gives that deep, glossy look.
Choosing Clear Coat
- 2K Clear Coat: This is the best choice for motorcycle fairings. It’s a two-part system (clear coat and hardener) that, when mixed, creates a very hard and durable finish. It offers excellent protection and shine. It’s also more resistant to fuel spills, which is important for bikes.
- 1K Clear Coat: This comes in one can. It’s easier to use but less durable and less chemical-resistant than 2K. Use it for small areas or if you’re on a tight budget, but be aware it won’t last as long.
Applying the Clear Coat
- Mix (if 2K): If using 2K clear, mix it precisely according to the instructions. Strain it.
- First Coat (Light): Apply a very light, even mist coat. This is often called a “tack coat.” It gives the next coats something to stick to and helps prevent runs. Let it flash off.
- Wet Coats: Apply two to three “wet” coats. A wet coat means you apply enough paint to make the surface look wet and glossy, but not so much that it runs. The key is to get it to flow out smoothly.
- Distance and Overlap: Keep the same distance (6-10 inches) and overlap (50%) as with the base coat.
- Flash Time: Allow 10-15 minutes flash time between wet coats. This lets solvents escape.
- Final Coat: The last coat should be a nice, even wet coat. Aim for a smooth, glossy finish with no “orange peel” texture. If you get a bit of orange peel, don’t worry, you can often fix it in the next step.
The Waiting Game: Curing Time Fairing Paint
Patience is a virtue, especially with paint. The curing time fairing paint is crucial.
- Dry to the Touch: The paint may feel dry to the touch in a few hours. This means solvents have evaporated enough for you to handle the part gently.
- Cure Time: Paint needs time to fully harden and reach its maximum durability. This “cure time” can be 24-72 hours, or even a week or more for some 2K clear coats. Always check the paint product’s instructions for exact times.
- Environmental Factors: Temperature and humidity affect drying and curing. Warm, dry conditions are best. Avoid painting in cold or humid weather.
- No Handling: During the curing time, avoid handling the fairings more than absolutely needed. Do not reassemble them. Do not expose them to direct sunlight or harsh conditions. Do not wash them or apply any chemicals.
Rushing the cure time can lead to a soft finish, reduced gloss, or damage when handling.
Polishing for a Pro Shine: Buffing Fairing Paint
Once your clear coat is fully cured (usually after 2-3 days minimum, or longer if recommended), you can take it to the next level. Buffing fairing paint removes tiny imperfections and gives a truly mirror-like finish.
Step 1: Inspect and Prepare
Look closely at your clear coat. You might see tiny dust nibs or a slight “orange peel” texture (like the skin of an orange). These can be removed by wet sanding.
Step 2: Wet Sanding the Clear Coat (Optional, but Recommended)
- Grit Progression: Start with 1500-grit wet sandpaper. Keep the fairing and paper wet with water. Gently sand the surface in straight lines. The goal is to make the surface uniformly dull, removing imperfections. Don’t press hard.
- Move to Finer Grits: Progress to 2000-grit, then possibly 2500-3000 grit. Each finer grit removes the scratches from the previous one. After 2000-grit, the surface should look uniformly dull, almost hazy.
- Clean: After sanding, thoroughly clean the fairing. Use water and a clean microfiber cloth. Dry it completely.
Step 3: Buffing Compounds
You’ll use a series of buffing compounds (also called rubbing compounds or polishes).
* Cutting Compound: This is the most abrasive. It removes the sanding marks. Apply a small amount to a foam cutting pad on your orbital polisher. Work a small area at a time. Move the polisher slowly. Wipe off excess compound with a clean microfiber cloth.
* Polishing Compound: This is less abrasive. It refines the shine after the cutting compound. Use a separate, less aggressive foam pad.
* Finishing Polish/Swirl Remover: This is the least abrasive. It removes any swirl marks left by previous steps and adds a final deep gloss. Use a soft finishing pad.
Step 4: Final Wipe Down
After buffing, wipe the fairings down with a clean, soft microfiber cloth to remove all residue. Your fairings should now have a deep, reflective shine!
| Step | Grit (Sanding) | Compound/Pad (Buffing) | Result |
|---|---|---|---|
| Clear Coat Prep | 1500, then 2000+ | N/A | Smooth, dull surface, no imperfections |
| Cutting | N/A | Coarse cutting compound, firm foam pad | Removes sanding marks, some gloss |
| Polishing | N/A | Medium polishing compound, medium foam pad | Increases gloss, removes light swirls |
| Finishing | N/A | Fine finishing polish, soft foam pad | Deep, mirror-like shine, no swirls |
Reassembly and Final Touches
Once your fairings are completely cured and buffed, it’s time to put them back on your bike. Use the photos you took earlier to help guide you. Be careful not to scratch your new paint.
Aftercare
- Wash Gently: For the first few weeks, wash your fairings gently with mild soap and water. Avoid harsh chemicals or automatic car washes.
- Wax/Sealant: After the paint has fully cured (check your product’s recommendations, often 30-90 days), you can apply a quality wax or paint sealant. This adds an extra layer of protection and keeps the shine.
DIY or Pro? Weighing Your Options
The process of a DIY motorcycle fairing repaint is detailed. It takes time, effort, and some money for materials. Is it always the right choice?
Pros of DIY:
- Cost Savings: Doing it yourself is often much cheaper than professional paint.
- Learning Experience: You gain new skills and a deeper understanding of your bike.
- Satisfaction: There’s a great feeling of pride when you ride a bike you’ve painted yourself.
- Customization: You have full control over the color and finish.
Cons of DIY:
- Time Consuming: It can take many hours, spread over several days or weeks.
- Requires Patience: Rushing leads to mistakes.
- Initial Cost: Buying tools and supplies can be an upfront expense.
- Learning Curve: Your first paint job might not be perfect. You need to learn the techniques.
- Space: You need a clean, dust-free area to work.
When to Consider a Professional:
- Complex Designs: If you want a multi-color scheme, graphics, or airbrushing, a professional has the skills and equipment.
- Major Damage: If your fairings are badly broken or warped, a pro might have better repair methods.
- Lack of Time/Space: If you don’t have the time, patience, or a suitable workspace, a pro might be worth the cost.
- Show Quality: If you want a truly flawless, show-quality finish, a professional painter will often achieve better results.
For most riders wanting a fresh look, a DIY motorcycle fairing repaint is a great project. It’s a chance to bond with your bike and save money.
Troubleshooting Common Issues
Even with careful work, issues can pop up. Here’s how to fix common problems:
- Runs or Sags: These happen when you apply too much paint in one spot. If wet, gently dab excess with a cloth. If dry, let it cure fully, then wet sand the run smooth with 1500-2000 grit, then buff. You might need to re-clear coat that area.
- Orange Peel: This is a bumpy texture like an orange peel. It happens from incorrect spray gun settings, paint too thick, or not enough clear coat to flow out. If minor, wet sand with 1500-2000 grit and buff. If severe, you may need to sand it flat and re-clear coat.
- Fisheye: Small craters in the paint. Caused by contamination (like silicone or oil) on the surface. To fix, you usually have to sand down the affected area completely, re-clean with wax/grease remover, and repaint. Prevention is key here.
- Lack of Adhesion (Peeling): Paint not sticking to the surface. This is a major issue. It often happens from poor preparation (not enough sanding, not using adhesion promoter, or not cleaning thoroughly). To fix, you must sand off the peeling paint, re-prep the surface carefully, and start over.
Frequently Asked Questions
Q: How long does painting motorcycle fairings take?
A: It depends on your speed and the paint’s drying times. Expect at least 3-5 days for the full process. This includes taking things apart, cleaning, sanding, priming, painting, clear coating, and allowing for drying between steps. The final buffing and reassembly can add another day.
Q: Can I paint over old paint?
A: Yes, you can. You just need to sand the old paint properly. Use 400-600 grit sandpaper to scuff the old paint until it’s dull. This gives the new primer and paint something to stick to. Make sure the old paint is not peeling or cracking. If it is, you need to remove it first.
Q: What if I don’t use primer?
A: Not using primer, especially an adhesion promoter for plastic, means your paint will likely not stick well. It could chip, peel, or scratch very easily. Primer also helps fill small sanding marks and gives an even base color. Always use primer!
Q: How many cans of spray paint do I need for a full set of fairings?
A: This varies by fairing size and paint brand. For a full sport bike set, you might need 2-3 cans of primer, 3-5 cans of base coat, and 2-3 cans of 2K clear coat. It’s always better to buy an extra can than run out in the middle of a coat.
Q: Can I use car paint on motorcycle fairings?
A: Yes, most automotive paints are suitable for motorcycle fairings. They are designed to be flexible enough for plastic and durable for outdoor use. Always check the paint’s label to ensure it’s compatible with plastics and can be used on exterior car or bike parts.
Q: How do I store painted fairings while they cure?
A: Store them in a clean, dust-free area with stable temperature and good airflow. Avoid direct sunlight. Keep them away from anything that could bump or touch the fresh paint. Hang them if possible to prevent any contact points.
Q: How long does a DIY paint job last?
A: With proper preparation, good quality materials (especially a 2K clear coat), and careful application, a DIY paint job can last many years, even 5-10 years or more, similar to a factory finish. Its lifespan depends heavily on the quality of work and how well you care for it afterward.
Painting your motorcycle fairings is a big project. But with the right steps and patience, you can achieve amazing results. Take your time with each stage, especially the prep. A well-painted bike stands out and reflects the care you put into it. Enjoy your custom ride!